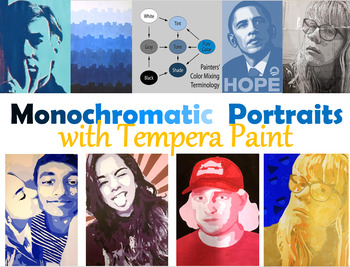
Monochromatic Portraits with Tempera Paint
- PPTX
Description
This easy to follow Power-point presentation contains 123 image-packed slides designed to help you and your students create a beautiful and accurate monochromatic portrait using tempera paint (acrylic paint could easily be substituted). It’s really three projects in one, as there are two warm-up activities included which show your students how to mix paint and how to create an interesting composition as well. There are links to videos, introductions to famous artists both old and new, step by step directions, a printable worksheet, differentiated ways to create the project, plenty of examples, and so much more. If you’re looking for a project that will take a 2-3 weeks (including the warm-up activities), and you want your students to create something they’ll be proud of while also learning about tints, tones, shade, color mixing, enlarging, and more, then this presentation is for you.
Here’s a closer look at all this presentation has to offer:
This first group of slides look at monochromatic color. You’ll learn its’ definition, see illustrated examples, and learn how artists mix tints, shades, and tones. You’ll learn about tempera paint. How is it made? What can master artists accomplished with tempera? Watch the video, print the worksheet, and let your students learn how to work with black and white paint to create a range of values, followed by learning how to create their own tints and shades from a pure hue.
Exercise #2 asks the students to create a landscape or city-scape that is monochromatic and that illustrates the concept of atmospheric perspective. Also known as aerial perspective, this activity allows the students a great deal of compositional freedom while asking them to use their newly found knowledge of monochromatic color mixing. Numerous examples of student solutions are shown. This activity is quite helpful not merely because the color mixing from the first activity is solidified, but there is also a more skillful and detail-oriented approach to painting in the composition and so handing the paintbrushes and paint application become stronger as well.
The next section looks at a brief history of how we got here and why I feel that that these simplified portraits are important. You’ll view and discuss numerous artworks created by Andy Warhol, Jim Fitzpatrick and his famous Che Guevara print, Shepard Fairey’s recent work such as his famous Obama / HOPE poster, as well as others who try to emulate their unique styles. Other artists scattered throughout the presentation include Chuck Close, the band: OK GO, Felice Varini, and more.
Now you’re ready for the Final project: The Portrait. I allow my students to paint themselves, a friend, famous person, family member or even a pet for their portrait. I currently teach at the high school level, so the students are expected to find their own pictures, and email them to themselves. Upper elementary or middle school students may require you help take pictures or print them. We reserve the computer lab for one day while we retrieve our camera-phone selfies, emailed pictures, or find a portrait to work with online.
Included are directions for multiple ways to take your chosen photograph and separate it into 4-6 different values. You can use programs such as Power-point, Word, or common apps like PhotoMania, and with a few simple clicks, your portrait is simplified and separated into easy-to-color sections. Next comes the enlarging process. Your understanding and availability surrounding technology may differ from mine, so again, I’ve included multiple ways to enlarge your photo so that it can be painted on a grand scale. I’ve included directions for using the grid method of enlarging. I’ve also included directions for how to poster-print a number of pieces of paper (later taped back together and traced), as well as using overhead, opaque and digital projectors if you have the means. The painting process is also spelled out in easy to follow steps to ensure success.
The presentation wraps up with numerous student examples done in a wide variety of colors, and unique and creative solutions. The goals I wanted my students to accomplish are included as well. I believe that you and your students will enjoy this unit as much as mine do and I trust that your results will be comparable to the amazing work that my students produce year after year. Enjoy!
-Bo (The Art Guru)


