
3D Print Your Own School Supplies: Level 2 Bundle


- Zip
Products in this Bundle (3)
Also included in
 Use these step-by-step tutorials to teach your students (or yourself) how to create 3D Printable objects. This Mega Bundle includes complete tutorials to show you and your students how to create: a hyperboloid pencil holder (Level 1)a bookmark (Level 1)a zipper pull / keychain (Level 1)a flexi-animaPrice $24.00Original Price $33.00Save $9.00
Description
Overview
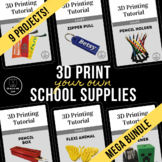
Use these step-by-step tutorials to teach your students (or yourself) how to create 3D Printable objects:
- a flexi-animal
- a hinged pencil box
- a working pencil sharpener
Complete each project in Tinkercad, a free online program for 3D modeling.
For each project you will receive 3 different formats.
- Booklet: Print this .pdf file double-sided on the short-edge. Fold the stack of papers in half, staple along the folded edge to create a booklet.
- Screen: View this .pdf file on your screen or print it out if you can't or don't wish to print a booklet.
- YouTube video: This walks you or your students (or you) through the process step-by-step.
*****************************************************************************
Experience Level:
These are all Level 2 tutorials, meaning that they are designed for students who have some 3D design experience. Students should already be comfortable opening Tinkercad and creating a new design. They should already be familiar with basic 3D design functions, such as creating, re-sizing, rotating, grouping, duplicating and aligning objects. The Level 2 (Intermediate) tutorials allow students to perform the above tasks more independently, while teaching them to use more advanced techniques, such as using the ruler and workplane features to precisely position objects.
*****************************************************************************
Required Resources:
To use the tutorial, you will need a computer with Internet access. If you are using the tutorial with a class, you would ideally be in a computer lab with one computer per student.
If you want students to use the video tutorial, they will need headphones so they don't disturb those around them.
Prior to using the tutorial with a class, you should "create a class" on Tinkercad.
To print the created projects, you will need a 3D Printer and Filament (PLA filament recommended).
To finish the pencil sharpener, you will need a sharpening element, such as those foundhere.
*****************************************************************************
Tips for in-class use:
- Option 1: Give each student a printed copy of the tutorial. Let them follow it at their own pace. This option is particularly useful for classes in which students' computer experience levels vary greatly.
- Option 2: Have each student open the video file or the Screen version of the tutorial. Show students how to have 2 windows open simultaneously on their computers. They should have the tutorial open in one window and Tinkercad open in the other. This option works best if your printing/copying resources are limited and your students are experienced computer users.
- Option 3: Use a projector to display the tutorial. Have students follow along as you go through the tutorial step-by-step. This option will be the best for younger students and for those with limited computer experience.
*****************************************************************************
Each tutorial may also be purchased separately:
