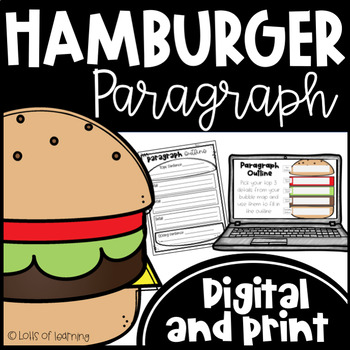
Hamburger Paragraph Writing - Print & Digital - Template - Graphic Organizers
- Zip
- Google Apps™

What educators are saying
Also included in
- If you are teaching 3rd grade writing, 4th grade writing, or 5th grade writing this year (in a classroom or homeschooling), then this curriculum will be a huge time-saver. Whenever you need to teach a new writing skill such as paragraph writing, 5-paragraph essays, opinion writing, informational wriPrice $54.40Original Price $115.75Save $61.35
Description
Want to teach your students how to write a paragraph using the hamburger method, but you're not sure where to begin? This resource has everything you need to help students with writing a paragraph. The 83-slide PowerPoint or Google Slides, make it so easy to teach students what a paragraph needs and how they should write one. The brainstorming pages, hamburger writing templates/graphic organizers, anchor chart pieces, drafting paper, peer editing sheets, and publishing paper all make it easy to guide your students through the writing process as they write a well-written and organized paragraph. When you are done teaching this unit, students will know how to write a paragraph that has a topic sentence, at least 3 supporting details, transitional words and phrases, and a closing sentence. Please click the preview to get a close-up of everything that is included!
*If you are homeschooling or teaching virtually, please scroll down until you find the information you need
The PRINT portion of this resource includes the following (great for in-class learning or homeschooling):
-An 83-slide PowerPoint that teaches how to write a paragraph
-A companion handout (students fill in a few blanks while going through the PowerPoint)
-A transitional words/phrases handout (students can refer to it while writing their paragraphs so they can have an idea of which transitional words they can use)
-Two different brainstorming pages (one design has students choose from 4 different writing prompts. The other design allows for any writing prompt that you give them.)
- 6 different designs of hamburger paragraph writing templates/outlines/graphic organizers. Before filling out the hamburger paragraph graphic organizers, student choose their top 3 supporting details from the brainstorming page and then turn them into sentences in the graphic organizer.
-Rough draft paper (dotted lines with big spaces which allows a lot of room for annotations. ARMS Check boxes are at the bottom of the rough draft paper for when students are ready to revise their writing. ARMS stands for Add more details Remove any unnecessary words, Move words around, and Substitute boring words)
-Peer editing sheets (instead of having students edit each other's papers, they check for certain criteria and give feedback)
-Writing conference group sheets (use these while reading through your students' paragraphs. If there is anything they need to work on, you can put them in a group which you will meet with later. Instructions on how to use these sheets are included).
-Final draft paper (students can write their final draft on the decorative, lined paper)
-Detailed instructions on how to use all of the above resources
Teachers Love This Resource!
Jennifer ⭐️ ⭐️ ⭐️ ⭐️ ⭐️ "This is a great, engaging resource that helped my students get the concepts of paragraph writing. I've used other resources but they just didn't stick with the students, but after using this last fall they still remember the parts and talk about their 'hamburger' when writing paragraphs."
Byte Sized Resources ⭐️ ⭐️ ⭐️ ⭐️ ⭐️ "This resource was the perfect way for me to introduce writing a paragraph to my students. The analogy of the burger with the different parts of the paragraph really resonated with my students. What makes this resource stand apart from others is that the teaching slides, lesson plan, and plethora of resources (organizers, anchor charts, draft pages) included.
DAY 1
To begin your instruction of teaching how to write an organized paragraph, you will first use the 83-slide PowerPoint. If you are teaching your students face-to-face in the classroom, simply use the PowerPoint in your classroom. However, if you are teaching remotely, then your students can view the PowerPoint in Google Slides (I've included a link that, when clicked, will allow you to make a copy of the PowerPoint in Google Slides. When you click the "Make a copy" button, the PowerPoint will appear in Google Slides. You can then easily add it to your Google Classroom).
The PowerPoint follows the following format: (please click the preview to see some of the slides!)
Slides 2-8 Introduce the subject in a fun way. (Begins with a hypothetical story where the students go to a restaurant and order a burger, but the waiter brings them just a bun.)
Slides 9-10 Topic Sentence
Slides 11-12 Supporting Details
Slides 13-36 Transitions (These slides thoroughly teach what transition words and phrases are. They include a few examples of paragraphs that don't have transition words and how they sound much better with them. I use a train to explain what transition words are and that they connect all of the cars. If you have already taught your students what transition words and phrases are, then you can delete these slides)
Slides 37-39 More info on supporting details
Slides 40-41 Closing sentence
Slides 42-46 Paragraph warnings (Don't make it messy. Keep it organized)
Slides 47-50 Finishing up the hypothetical story
Slides 51-55 Review what they just learned
Slides 56-71 Teacher demonstration of reading a writing prompt and writing a paragraph that responds to that prompt (I do)
Slides 72-78 Class practice (we do)
Slides 80-83 Highlight student work (These slides don't get used until Day 5)
While going through the PowerPoint, students can follow along by filling in the blanks that are on the companion handout.
**I have included anchor chart pieces that you can print and cut to make an anchor chart. This anchor chart can hang on the wall so that students can refer to it throughout the year. Or, for those of you who prefer teaching with an anchor chart over a PowerPoint, I have included instructions on how to do that.
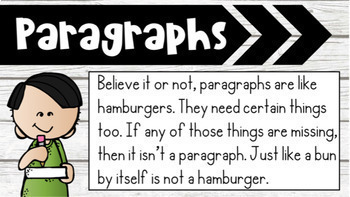
** I have also included bulletin board pieces which are bigger than the anchor chart pieces and include clipart of kids and a speech bubble that explains what a paragraph needs. Click the preview to see what the finished product of the bulletin board looks like.
DAY 2
After going through the PowerPoint, or after making an anchor chart with your class (or both), students begin the writing process by responding to a prompt and brainstorming what supporting details they want to use. Then they organize their ideas in one of the hamburger graphic organizers (there are 9 different designs to choose from). Then they draft their ideas onto rough draft paper, which is included. My rough draft paper choices are unique because there are pages that just have lines, or you can choose pages that have checkboxes at the bottom. My favorite is the one that has ARMS checkboxes at the bottoms. (Add more detail, remove unnecessary details, move words around, and substitute boring words.) I have my students use those checkboxes to revise their writing. It's rough draft paper you can use the entire year for any writing project.
DAY 3
Once students have finished writing their first draft, then they meet with a partner and peer edit each others' papers. To do so, all they have to do is trade paragraphs with someone and then fill in one of the peer editing sheets that I have included.
**After the students peer edit each others' paragraphs, I recommend that you read through all of their paragraphs so you can edit them. Then, the next day, you can hold a writing conference with all of your students. I have provided conference forms that you can use. They are designed to help you group your students. You use these forms while you are reading through your students' paragraphs. If you notice that one of your students is struggling with their closing sentence, then you write their name in that group.
DAY 4
Students meet with you (either individually or in groups), and strive to have a growth mindset as you show them what they did well and what they can improve.
DAY 5
Students publish their writing on lined paper that I have provided. This is also the day that you can highlight some of your students' work. Just open up the PowerPoint and scroll to the bottom. Type in their name and then have the student read their paragraph to the class OR you can type their paragraph into the PowerPoint. (The lesson plan and PowerPoint explain how to do this.)
AFTER DAY 5
When students finish their paragraphs, you can easily grade them with the rubric I have included. You can choose from a full sheet or half-sheets.
SOME OF THE RESOURCES ARE EDITABLE!
The peer editing sheet, conference sheets, final draft paper, and rubrics are editable!
Please note: The PowerPoints cannot be edited due to the copyright requirements made by the contributing artists (clip art, font, background).
The DIGITAL Portion of this resource includes the following (great for remote learning):
-A PDF of lesson plans. Each lesson plan contains links. Just click the links and you will be asked if you want to make a copy of the slides. Click, "make a copy" and then the slides will appear in your Google Drive account. You can delete slides, add slides, and add text to the slides.
-An 83-slide PowerPoint in Google Slides that teaches how to write a paragraph
-Google Slides that contain writing prompts, a brainstorming bubble map where students can type their ideas, a spot for them to type their rough draft, and then a slide where they can revise their paragraph. You can use the writing prompts that I have included or type your own.
-Peer editing slides. To use these, you will need to copy each student's paragraph and paste it into a peer editing slide. Then you will need to assign it to another student. Once the student receives their peer's paragraph, they check to see if their peer has included everything a paragraph needs by answering a few questions.
-Teacher Edit/Final Draft slides. This is just one slide. On the left slide, you can paste their rough drafts. Then you can edit their drafts with editing marks and inserting text boxes with comments. Then you can send the slide back to each student. Once they receive it, they can type their final draft on the right side while looking at your editing marks and comments on the right side.
-Final draft slides. You can use these if you think your students will enjoy typing their final drafts on colorful slides.
-Rubric Slide for easy grading
*Please note that you need Google Slides and Google Classroom to use the digital portion of this product. Each set of slides comes with instructions at the beginning
Are you homeschooling your child this year? Here's how you can use this resource at home:
If you don't want to spend a lot of time preparing to teach your child how to write a paragraph, this resource might be exactly what you're looking for. The lesson plan that comes with this resource is so detailed, that you will know exactly what to do to teach your child how to write a paragraph. This resource comes with a PowerPoint that does all the "teaching" for you. All you have to do is set up the PowerPoint for your child and have them go through it. Any time the PowerPoint asks your child to discuss information with a neighbor, they can discuss it with a sibling or with you. A worksheet is included that your child can fill out while going through the PowerPoint.
After going through the PowerPoint with your child, you can give them a writing prompt (a few are included) and have them write a paragraph. The graphic organizers make it easy for your child to get started and then, when they're all done, the rubric makes it easy for you to "grade" their writing and ensure their paragraph includes everything that a paragraph needs (a topic sentence, supporting details, transitional words and phrases, and a concluding sentence).
Be the first to know about my new products, discounts, and freebies by following me on TPT! Look for the green star next to my store logo and click it to become a follower. There you have it! You will receive email updates about my store. ☺
© Lotts of Learning


